
1. 项目源代码
为了方便演示,以及大家上手实验,我搭建了一个简单的注册登录的后台,在不加 Redis 的情况下的源代码如下
通过网盘分享的文件:study-无redis.zip
链接: https://pan.baidu.com/s/1etc29in_6q8CDOFm-Gb7Nw?pwd=yuer 提取码: yuer
2. 数据库结构
数据库结构如下所示:
/*
 Navicat Premium Data Transfer

 Source Server         : localhost_3306
 Source Server Type    : MySQL
 Source Server Version : 80016
 Source Host           : localhost:3306
 Source Schema         : redis

 Target Server Type    : MySQL
 Target Server Version : 80016
 File Encoding         : 65001

 Date: 07/04/2025 10:55:27
*/

SET NAMES utf8mb4;
SET FOREIGN_KEY_CHECKS = 0;

-- ----------------------------
-- Table structure for usr
-- ----------------------------
DROP TABLE IF EXISTS `usr`;
CREATE TABLE `usr`  (
  `uid` int(11) NOT NULL,
  `username` varchar(255) CHARACTER SET utf8 COLLATE utf8_bin NULL DEFAULT NULL,
  `password` varchar(255) CHARACTER SET utf8 COLLATE utf8_bin NULL DEFAULT NULL,
  PRIMARY KEY (`uid`) USING BTREE
) ENGINE = InnoDB CHARACTER SET = utf8 COLLATE = utf8_bin ROW_FORMAT = Dynamic;

-- ----------------------------
-- Records of usr
-- ----------------------------
INSERT INTO `usr` VALUES (1, 'yuer', 'yuerpass');
INSERT INTO `usr` VALUES (686, '123', '456');

SET FOREIGN_KEY_CHECKS = 1;
3. Redis集成
接下来我们添加 Redis 支持:
3.1 添加 Redis 依赖
		<!-- Redis依赖 -->
		<dependency>
			<groupId>org.springframework.boot</groupId>
			<artifactId>spring-boot-starter-data-redis</artifactId>
		</dependency>
		<!-- 添加Jackson序列化依赖 -->
		<dependency>
			<groupId>com.fasterxml.jackson.core</groupId>
			<artifactId>jackson-databind</artifactId>
		</dependency>
3.2 配置 Redis
在 config 包下新建一个 RedisConfig 类:
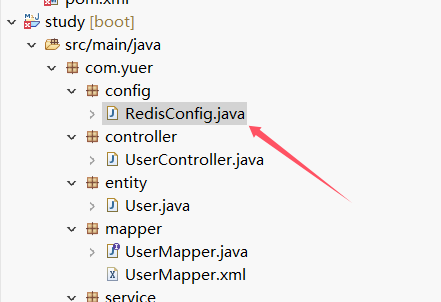
package com.yuer.config;

import com.fasterxml.jackson.databind.ObjectMapper;
import org.springframework.cache.annotation.EnableCaching;
import org.springframework.cache.CacheManager;
import org.springframework.context.annotation.Bean;
import org.springframework.context.annotation.Configuration;
import org.springframework.data.redis.cache.RedisCacheConfiguration;
import org.springframework.data.redis.cache.RedisCacheWriter;
import org.springframework.data.redis.connection.RedisConnectionFactory;
import org.springframework.data.redis.core.RedisTemplate;
import org.springframework.data.redis.serializer.Jackson2JsonRedisSerializer;
import org.springframework.data.redis.serializer.RedisSerializationContext;
import org.springframework.data.redis.serializer.StringRedisSerializer;

@Configuration
@EnableCaching
public class RedisConfig {

    @Bean
    public RedisTemplate<String, Object> redisTemplate(RedisConnectionFactory connectionFactory) {
        RedisTemplate<String, Object> redisTemplate = new RedisTemplate<>();
        redisTemplate.setConnectionFactory(connectionFactory);

        // 使用 StringRedisSerializer 来序列化 key
        redisTemplate.setKeySerializer(new StringRedisSerializer());

        // 使用 Jackson2JsonRedisSerializer 来序列化 value 为 JSON
        Jackson2JsonRedisSerializer<Object> jackson2JsonRedisSerializer = new Jackson2JsonRedisSerializer<>(Object.class);

        // 创建 ObjectMapper(可自定义配置)
        ObjectMapper objectMapper = new ObjectMapper();
        jackson2JsonRedisSerializer.setObjectMapper(objectMapper);

        // 设置 value 和 Hash 值的序列化方式为 Jackson2JsonRedisSerializer
        redisTemplate.setValueSerializer(jackson2JsonRedisSerializer);
        redisTemplate.setHashValueSerializer(jackson2JsonRedisSerializer);

        // 设置 Hash key 的序列化方式为 StringRedisSerializer
        redisTemplate.setHashKeySerializer(new StringRedisSerializer());

        redisTemplate.afterPropertiesSet();
        return redisTemplate;
    }

    // 如果需要 CacheManager 也可以进行配置,示例如下:
    @Bean
    public CacheManager cacheManager(RedisConnectionFactory connectionFactory) {
        return new org.springframework.data.redis.cache.RedisCacheManager(
            RedisCacheWriter.nonLockingRedisCacheWriter(connectionFactory),
            RedisCacheConfiguration.defaultCacheConfig().serializeValuesWith(
                RedisSerializationContext.SerializationPair.fromSerializer(new Jackson2JsonRedisSerializer<>(Object.class))
            )
        );
    }
}
3.3 配置 application.properties
spring.redis.host=localhost
spring.redis.port=6379
# spring.redis.password=
spring.redis.database=0
spring.redis.timeout=3000
3.4 修改 UserService 实现类
修改 userservice.impl 中的登录方法:
@Override
public User login(String username, String password) {
    // 根据用户名查询用户
    User user = userMapper.selectByUsername(username);

    // 从缓存中读取登录的数据
    User cachedUser = (User) redisTemplate.opsForValue().get("user:" + user.getUid().toString());
    if(cachedUser != null) {
        System.out.print("缓存命中!登录成功!");
    } else {
        System.out.print("未寻找到缓存,准备使用mysql查询");
    }

    // 如果用户存在且密码匹配,则登录成功,通过数据库,并且缓存redis
    if (user != null && password.equals(user.getPassword())) {
        redisTemplate.opsForValue().set("user:" + user.getUid().toString(), user);
        return user;
    }

    // 登录失败
    return null;
}
当用户首次登录时,需要从 MySQL 查询用户信息,之后可以缓存登录的数据。
3.5 测试
访问 localhost:8080
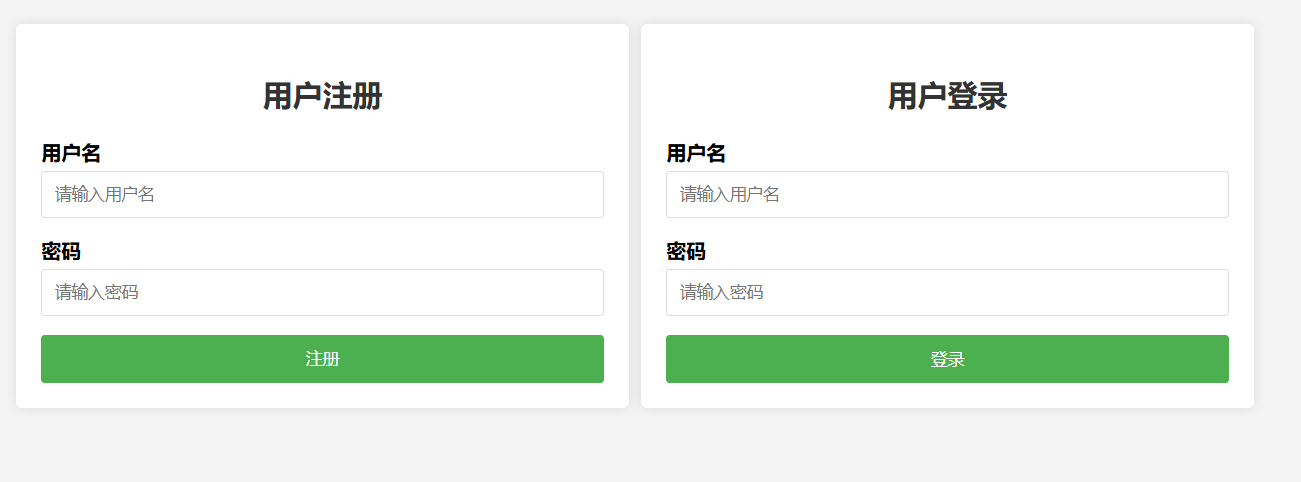
第一次登录
第一次登录需要查询 MySQL:

第二次登录
第二次登录时,已缓存登录数据:

4. 通过注解实现
相信通过3.4你已经学会了,但是这样有一个痛点,难道说每个API实现的时候都要手动写代码吗?假设我一个一个接口都写好了,万一哪天我移除redis,那我还要去读每个API的业务逻辑吗?或者我已经有一个项目,写好了service层,难道我再去读每个API再重新修改业务逻辑?这显然是不现实的。通过注解就非常方便
4.1 添加Redis依赖
如3.1
4.2 配置Redis
如3.2
4.3 配置 application.properties
如3.3
4.4 添加注解
找到Userserviceimpl.java中添加如下注解
@Cacheable(value = "user", key = "#username")
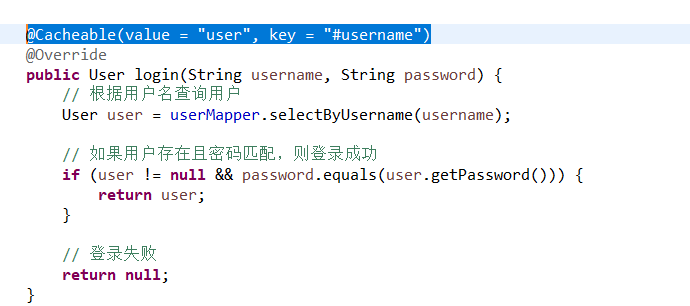
但是如果你需要用复合方式命名,也是可以的
@Cacheable(value = "user", key = "'name_' + #username ")
4.5 测试
访问localhost:8080
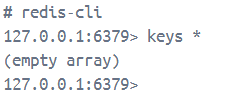
登录之前先查看Redis缓存
连接Redis
redis-cli
查看所有数据
keys *
可以看到是空的
点击登录按钮!
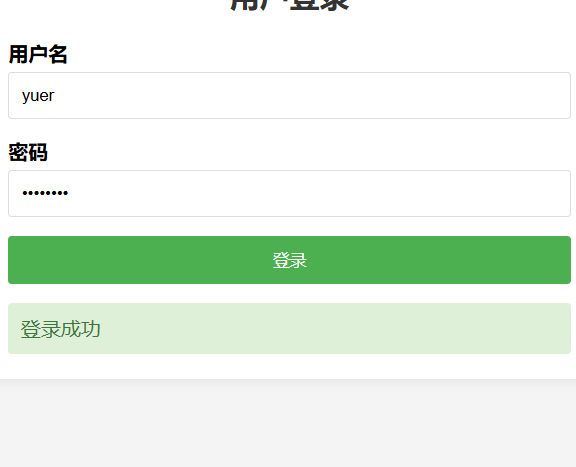
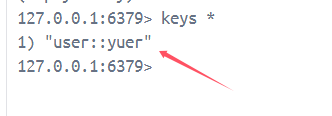
登录成功以后返回去重新输命令就好了,成功写入user数据
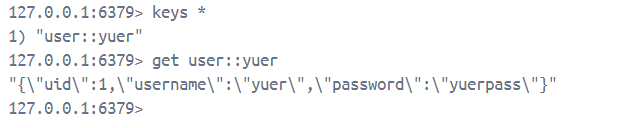
再输入查看具体键值的命令,可以看到所存的具体内容
get user::yuer
5. Redis常用命令
# 连接到 Redis
redis-cli

# 清除当前数据库缓存
flushdb

# 清除所有缓存
FLUSHALL

# 查看所有存储的键
keys *

# 查看该键存储类型
type key

#  查看键值
get key